Get ready to tantalize your taste buds with these irresistible Homemade Garlic Butter Cheese Bombs! Imagine biting into a golden, buttery homemade bread filled with gooey, melty mozzarella cheese. It’s brushed with a mouthwatering garlic herb butter. These cheesy appetizers are the ultimate party snacks that will have everyone reaching for more.
Whether you’re hosting a gathering, looking for a delicious side dish, or simply craving a satisfying snack, these garlic bread-inspired cheese bombs are the perfect choice. The best part? You can whip up a batch in just 30 minutes, making them a convenient and crowd-pleasing option for any occasion.
Key Takeaways
- Homemade Garlic Butter Cheese Bombs are a delicious and easy-to-make appetizer
- Filled with melty mozzarella cheese and brushed with flavorful garlic herb butter
- Perfect for parties, snacks, or as a side dish
- Can be ready in just 30 minutes
- Golden, buttery homemade bread bites that are sure to impress your guests
Gather Your Ingredients for Garlic Butter Cheese Bombs
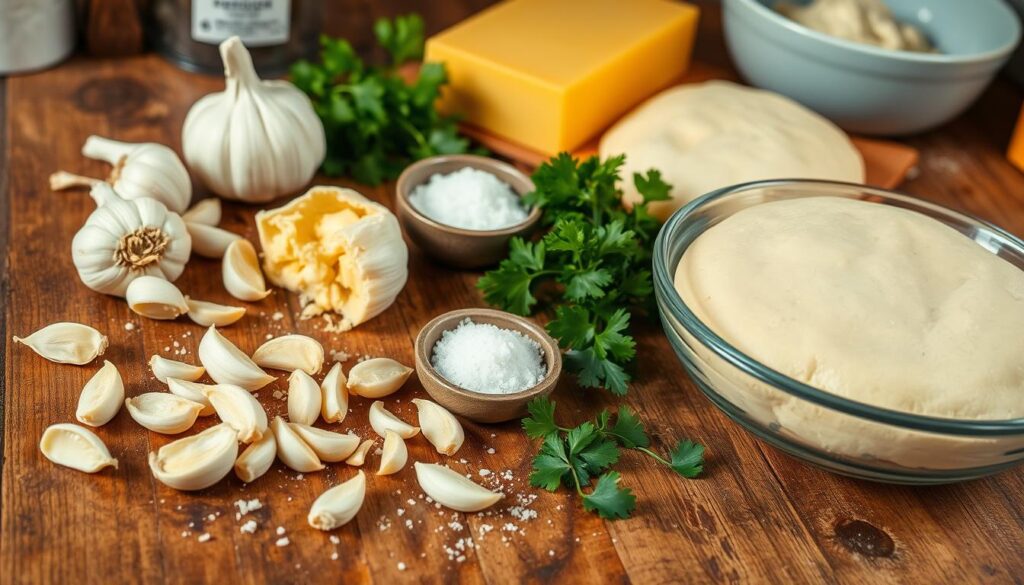
Before you start making these tasty garlic butter cheese bombs, make sure you have all the ingredients. This recipe uses simple, top-quality ingredients. They come together to make a treat that’s hard to resist.
Dough Ingredients
The dough is the base of a great cheese bomb. You need ingredients for a soft, fluffy dough. Here’s what you’ll need:
- All-purpose flour
- Instant yeast
- Sugar
- Salt
- Milk
- Eggs
- Unsalted butter
Filling Ingredients
The filling is the highlight of the cheese bomb. For this recipe, use:
- Mozzarella cheese, shredded or diced into small cubes
Mozzarella cheese gives the filling a stretchy, stringy texture. It’s perfect with the soft dough.
Garlic Butter Topping Ingredients
A cheese bomb isn’t complete without a tasty garlic butter topping. You’ll need:
| Ingredient | Amount |
|---|---|
| Unsalted butter, melted | 1/4 cup |
| Garlic cloves, minced | 3-4 cloves |
| Fresh parsley, chopped | 2 tablespoons |
The melted butter, garlic, and parsley make a fragrant, savory topping. It elevates these cheese bombs to a new level.
Now that you have all your ingredients, you’re ready to make your own garlic butter cheese bombs!
Step-by-Step Guide to Making Homemade Garlic Butter Cheese Bombs
Making your own garlic butter cheese bombs at home is easier than you might think! With just a few simple steps, you can create these deliciously cheesy and garlicky treats. They’re perfect for snacking or as a side dish.
To begin, gather all the necessary ingredients for the dough, filling, and garlic butter topping. Then, follow these steps:
- Dough preparation: Start by mixing the dough ingredients until a soft, pliable dough forms. Knead the dough for a few minutes to ensure it’s smooth and elastic.
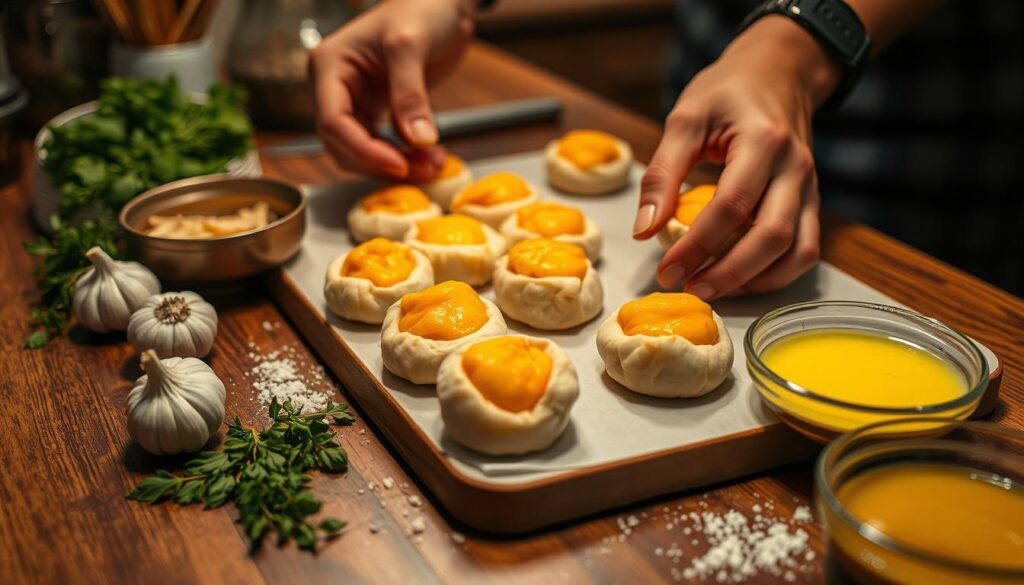
- Shaping cheese bombs: Divide the dough into equal-sized portions and shape them into balls. Flatten each ball slightly and place a cube of mozzarella cheese in the center.
- Cheese filling: Wrap the dough around the cheese, sealing it completely to create a cheese-filled dough ball. Repeat this process for all the dough portions.
- Garlic butter brushing: Melt the butter and mix in minced garlic, parsley, and salt. Brush this garlic butter mixture generously over each cheese bomb, ensuring they’re evenly coated.
- Baking: Arrange the cheese bombs on a baking sheet and bake them in a preheated oven until golden brown and the cheese is melted inside.
| Step | Description |
|---|---|
| 1 | Prepare the dough |
| 2 | Shape the dough balls |
| 3 | Fill with cheese |
| 4 | Brush with garlic butter |
| 5 | Bake until golden brown |
Once your homemade garlic butter cheese bombs are baked to perfection, let them cool slightly before serving. Enjoy these cheesy, garlicky bites while they’re still warm and gooey!
Tips for Perfectly Soft and Fluffy Dough
Making delicious garlic butter cheese bombs starts with the right dough. A few simple steps can help you get a soft, elastic dough. This dough will rise beautifully and bake up fluffy and tender.
Kneading Techniques
Kneading is key to developing the dough’s gluten. This makes the dough elastic. Here are some tips for kneading:
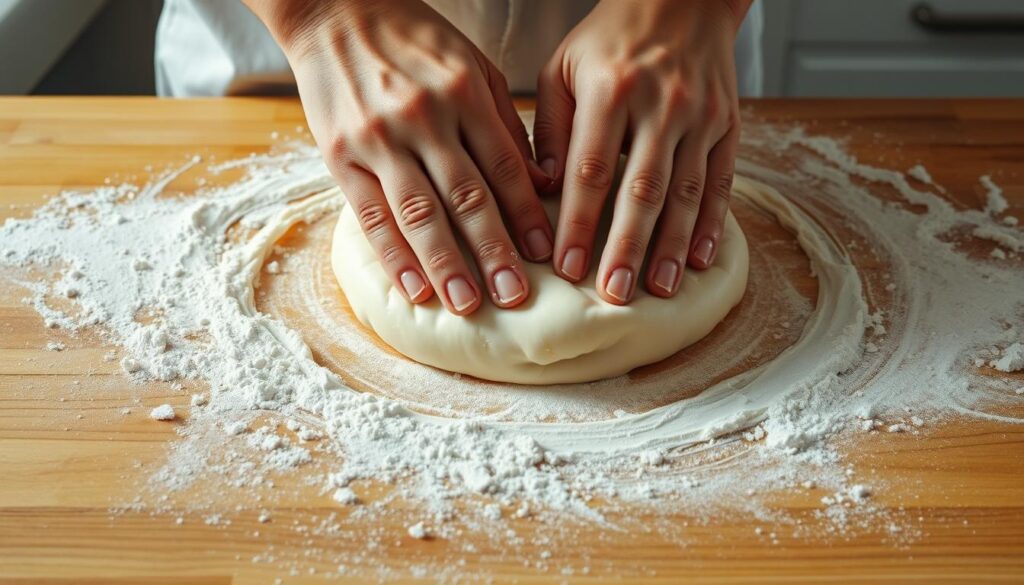
- Knead the dough on a lightly floured surface to prevent sticking
- Use the heel of your hand to push the dough away from you, then fold it back over itself
- Rotate the dough a quarter turn after each push and fold
- Continue kneading until the dough becomes smooth and elastic, about 8-10 minutes
To check if the dough is ready, press a finger into it. If it springs back quickly, it’s ready for proofing.
Proofing the Dough
Proofing lets the dough rise and develop its flavor and texture. To create the perfect warm environment for proofing, follow these steps:
| Proofing Step | Instructions |
|---|---|
| 1. Grease a bowl | Lightly grease a large bowl with oil or butter |
| 2. Place dough in bowl | Put the kneaded dough in the greased bowl and turn it to coat all sides |
| 3. Cover the bowl | Cover the bowl with a damp kitchen towel or plastic wrap |
| 4. Let the dough rise | Place the bowl in a warm spot (about 75°F/24°C) and let the dough rise until doubled in size, about 1 hour |
A longer rise time means a more flavorful dough. So, be patient and let the dough proof fully before shaping your cheese bombs.
Choosing the Best Cheese for Your Cheese Bombs
Choosing the right cheese is key to making perfect cheese bombs. The best cheese stretches well, tastes great, and mixes well with other ingredients. Let’s look at some top cheese picks for your homemade garlic butter cheese bombs.
Mozzarella Cheese
Mozzarella is a top pick for cheese bombs because it stretches so well. When heated, it turns into a stringy delight. Its mild, sweet taste also pairs well with garlic butter and dough.
Cheddar Cheese
Cheddar cheese is great for those who like a stronger taste. Aged cheddar adds a rich flavor that makes your cheese bombs stand out. But, it doesn’t stretch as much as mozzarella.
Combining Multiple Cheeses
Blending different cheeses can make your cheese bombs even better. Mixing mozzarella with sharp cheddar balances stretching and flavor. You can play with different cheese mixes to find your favorite taste.
| Cheese | Stretching Quality | Flavor Profile |
|---|---|---|
| Mozzarella | High | Mild, slightly sweet |
| Cheddar | Low to medium | Sharp, tangy, bold |
| Mozzarella + Cheddar Blend | Medium to high | Balanced stretching and flavor |
Choose high-quality cheeses for the best taste and texture. Fresh mozzarella and aged cheddar will give you the best results. Remember, the cheese is the main attraction, so pick wisely and enjoy!
Mastering the Art of Garlic Butter Topping
Creating the perfect garlic butter topping is key to elevating your homemade garlic butter cheese bombs from good to great. With a few simple techniques, you can unleash the full potential of garlic’s flavors. This will create a deliciously aromatic and savory topping that will have your taste buds singing.
Mincing Garlic for Maximum Flavor
To get the most out of your garlic, mince it finely. You can use a knife or a garlic press for this. A garlic press crushes the cloves, releasing oils and enzymes that give garlic its taste and aroma. You can also make a smooth garlic paste with a microplane grater or mortar and pestle.
Melting Butter for Easy Brushing
When melting butter for your garlic topping, you have options. For the simplest way, just melt the butter in a small saucepan over low heat. But for a richer flavor, try using clarified butter, also known as ghee. Clarified butter has a higher smoke point and a more intense, nutty flavor that complements the garlic beautifully.
Once your garlic and butter are ready, mix them together. Add the minced garlic or garlic paste to the melted butter and stir well. Use a pastry brush to gently brush the garlic butter over your cheese bombs before baking. This ensures each bite is filled with garlicky goodness.
By mastering the art of the garlic butter topping, you’ll elevate your homemade cheese bombs. Experiment with different garlic to butter ratios to find your perfect balance. Get ready to impress your friends and family with your culinary skills.
Shaping and Filling Your Cheese Bombs
Creating the perfect garlic butter cheese bombs is all about mastering the art of dough portioning and stuffing cheese. Start by dividing your dough into equal-sized portions. This ensures a uniform size for even baking. Then, gently flatten each portion and create a well in the center to hold the cheese filling.
Choosing the right cheese is key. Mozzarella is a classic choice for its stretchy, gooey texture. But feel free to try other cheeses like cheddar or a mix of your favorites. Cube or shred the cheese and fill each dough portion generously.
Now, it’s time to seal your cheese bombs. Gather the edges of the dough around the cheese, pinching and sealing the dough balls tightly. This prevents leakage during baking. Make sure to seal them completely to avoid any cheese oozing out.
Here are some tips for shaping and filling your cheese bombs:
- Keep your dough portions consistent in size for even baking
- Don’t overfill the cheese bombs, as this can make sealing difficult
- Pinch the seams tightly to create a secure seal
- Arrange the sealed cheese bombs on a baking sheet with space between each one
Here’s a handy table to guide you on how much filling to use for each cheese bomb:
| Dough Portion Size | Cheese Filling Amount |
|---|---|
| 1 oz | 1/2 oz |
| 1.5 oz | 3/4 oz |
| 2 oz | 1 oz |
With your cheese bombs shaped and filled, you’re one step closer to enjoying a delightful, cheesy snack. Next, we’ll explore how to achieve the perfect golden-brown crust and gooey center by baking your homemade garlic butter cheese bombs to.
Baking Homemade Garlic Butter Cheese Bombs to Perfection
Baking your garlic butter cheese bombs to golden brown perfection is key. It brings out the best flavor and texture. Make sure to watch the oven temperature and baking time closely.
Oven Temperature and Baking Time
Preheat your oven to 375°F (190°C) for the best results. This temperature helps the cheese bombs cook evenly. They should have a crispy outside and a soft inside.
The baking time depends on the size of your cheese bombs. Generally, it takes 12 to 15 minutes.
Here’s a table to help you figure out baking times based on size:
| Cheese Bomb Size | Baking Time |
|---|---|
| Small (1-1.5 inches) | 12-13 minutes |
| Medium (1.5-2 inches) | 13-14 minutes |
| Large (2-2.5 inches) | 14-15 minutes |
Checking for Doneness
To check if your cheese bombs are done, look at their color and the cheese. They should be golden brown on the outside and have melted, bubbly cheese inside.
If you’re not sure, use a food thermometer. The ideal internal temperature is around 190°F (88°C). This ensures the dough is cooked and the cheese is melted perfectly.
After baking, take the cheese bombs out of the oven. Let them cool a bit before serving. This helps the cheese set, making them easier to handle and enjoy.
Serving Suggestions for Your Cheesy Creations
Now that you’ve learned to make homemade garlic butter cheese bombs, it’s time to think about serving them. These cheesy treats go great with many dipping sauces and side dishes. They will make your meal better and impress your guests.
Dipping Sauces
Make your cheese bombs even better by dipping them in tasty sauces. For a classic taste, try marinara sauce. It pairs well with the cheesy filling. Ranch dressing is also great, offering a cool, creamy contrast.
Pairing with Salads or Soups
Cheese bombs are perfect with tomato soup or a fresh caesar salad. The tomato soup’s acidity balances the cheese’s richness. A caesar salad adds a nice crunch and tangy flavor.
Here are some ideas to inspire your next cheesy dish:
| Dipping Sauce | Pairing |
|---|---|
| Marinara sauce | Tomato soup |
| Ranch dressing | Caesar salad |
| Garlic aioli | Minestrone soup |
| Pesto | Arugula salad |
Feel free to mix and match your favorite sauces and sides. Whether as an appetizer or main course, these cheesy bites will be a hit.
Variations on the Classic Cheese Bomb Recipe
The classic garlic butter cheese bomb recipe is tasty on its own. But, feel free to try different variations to match your taste. Adding herbs, spices, and other fillings can bring new flavors to your cheese bombs.
Adding Herbs and Spices
Adding herbs and spices can enhance your cheese bombs’ flavor. For an Italian touch, mix Italian seasoning into the dough. For a spicy twist, add red pepper flakes to the garlic butter topping.
Here are some herb and spice combinations to try:
| Herb/Spice | Flavor Profile | Suggested Pairings |
|---|---|---|
| Italian seasoning | Savory, aromatic | Mozzarella, parmesan |
| Red pepper flakes | Spicy, hot | Cheddar, pepper jack |
| Rosemary | Piney, fragrant | Goat cheese, feta |
| Thyme | Earthy, slightly minty | Gruyere, Swiss |
Experimenting with Different Fillings
Try different cheeses and fillings to make unique cheese bombs. Add bacon bits or sliced pepperoni for a meaty flavor. Vegetarian options like sautéed mushrooms or caramelized onions can also enrich your cheese bombs.
Be creative and try new combinations. With herbs, spices, and different fillings, you can make many delicious cheese bomb variations. They’ll surely impress your family and friends.
Conclusion
Homemade Garlic Butter Cheese Bombs are a delightful and easy appetizer. They quickly become a party favorite. Their warm, gooey cheese filling and aromatic garlic butter topping impress everyone.
What’s great about making these cheese bombs at home is you can customize them. Try different cheeses, herbs, and spices for unique flavors. They’re perfect as a snack or with a hearty soup.
Next time you need a crowd-pleasing appetizer or a comforting snack, try these Homemade Garlic Butter Cheese Bombs. They’re easy to make with just a few ingredients. Get ready for the ultimate cheesy experience that everyone will love!
FAQ
Can I make the dough ahead of time?
Yes, you can make the dough ahead of time. Store it in the fridge for up to 24 hours. Let it come to room temperature before shaping and filling.
Is it possible to freeze the cheese bombs?
Yes, you can freeze the cheese bombs. Shape and fill the dough balls, then freeze them on a baking sheet. Once solid, put them in a freezer-safe bag or container. Store for up to 1 month. Thaw in the fridge overnight before baking.
Can I use different types of cheese?
Absolutely! Try mozzarella, cheddar, or other cheeses like provolone and Gouda. Make sure the cheese is sealed well to avoid leakage.
How can I reheat leftover cheese bombs?
Preheat your oven to 350°F (175°C). Place the cheese bombs on a baking sheet, covered with foil. Bake for 5-10 minutes. You can also microwave for 20-30 seconds, but they might be softer.
Can I make the cheese bombs smaller or larger?
Yes, you can adjust the size. Smaller ones are good for more servings and bake faster. Larger ones are for fewer servings and may need more time. Make sure the dough is evenly sized for even baking.
How long do the cheese bombs stay fresh?
Enjoy them warm and fresh from the oven. If you have leftovers, store them in an airtight container in the fridge for up to 3 days. Reheat in the oven or microwave before serving.


